Build a Reliable Tool-Calling Agent Loop on OpenRouter
OpenRouter ·
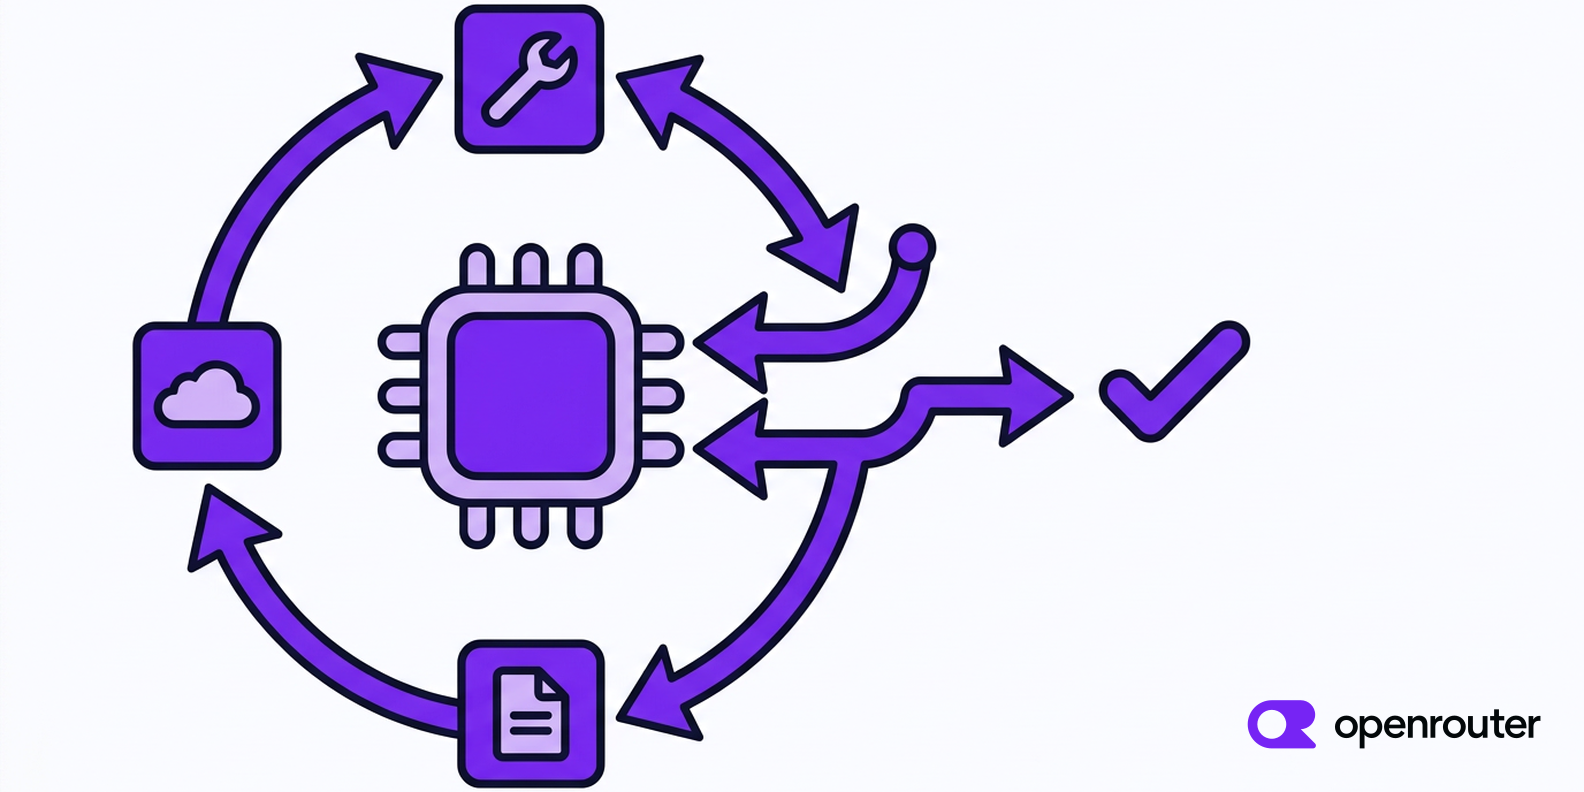
A tool-calling agent loop repeatedly sends the conversation and available tools to a model, executes any tool calls the model requests, appends the results, and asks the model what to do next. The loop ends when the model returns no tool calls or when an application-defined stop condition fires.
The model decides which tool to request, but your application parses the arguments, runs the function, and decides when the loop must stop.
This guide shows you how to build that loop with the OpenRouter TypeScript SDK. The example uses local weather data, so you can run it without setting up another service.
Tl;dr
- The model requests tools. Your application executes them and returns one result per tool call ID.
- Send the tool definitions on every request, including follow-up requests after tool results.
- Stop when the model returns no tool calls, when the same call repeats past a limit, or when an iteration cap is reached.
- The
modelsparameter gives you ordered model fallback, and Auto Exacto reorders providers on tool-calling requests by default.
How a tool-calling agent loop works
Set up the task, tools, and message history, then repeat these steps:
- Call the model with the full history and tool definitions.
- If the response has no tool calls, return the assistant’s text and stop.
- If this is the last permitted iteration, stop before running the tools. Their results could never reach the model.
- Stop if a call repeats too many times.
- Otherwise, run every tool call and append the assistant message and one result per call.
The loop also needs a hard limit. A model can repeat a failed call or keep searching for a better answer. Without an iteration cap, that behavior can continue until another part of the system stops it.
You don’t need an AI agent framework to build or understand this control flow. A small implementation is useful even if you later move the loop into a library.
Step 1: Set up the client and define your tools
Create a TypeScript project and install the OpenRouter TypeScript SDK and tsx:
mkdir openrouter-agent-loop
cd openrouter-agent-loop
npm init -y
npm pkg set type=module
npm install @openrouter/sdk
npm install --save-dev tsx
Create an OpenRouter API key, then make it available to the process:
export OPENROUTER_API_KEY="your-api-key"Create agent.ts and add the client, an ordered model list, and one local tool:
import { OpenRouter } from "@openrouter/sdk";
import type { ChatMessages, ChatToolCall } from "@openrouter/sdk/models";

if (!process.env.OPENROUTER_API_KEY) {
  throw new Error("Set OPENROUTER_API_KEY before running this example");
}

const openRouter = new OpenRouter({
  apiKey: process.env.OPENROUTER_API_KEY,
});

const models = [
  "google/gemini-3-flash-preview",
  "nvidia/nemotron-3.5-lightning",
];

const tools = [
  {
    type: "function" as const,
    function: {
      name: "get_weather",
      description: "Get local sample weather data for Lagos or London",
      parameters: {
        type: "object",
        properties: {
          city: { type: "string", enum: ["Lagos", "London"] },
        },
        required: ["city"],
        additionalProperties: false,
      },
    },
  },
];

const weatherByCity: Record<
  string,
  { temperatureC: number; conditions: string }
> = {
  lagos: { temperatureC: 29, conditions: "partly cloudy" },
  london: { temperatureC: 18, conditions: "overcast" },
};
The tool definition tells the model when to use the function and which arguments it accepts. The function itself stays inside your application because only your code can run it.
Keep the description specific and include the details the model needs to use the tool correctly. Here, naming the two supported cities helps the model produce valid arguments.
Both models in the list support tool calling. Model availability changes over time, so check the model catalog for the current list of models that support the tools parameter before you pick your own.
Step 2: Call the model and read the response
Next, add a helper that makes one model request and returns the assistant message and any tool calls:
async function sendTurn(
  messages: ChatMessages[],
  toolChoice: "required" | "auto",
) {
  const result = await openRouter.chat.send({
    chatRequest: {
      models,
      messages,
      tools,
      toolChoice,
      maxCompletionTokens: 1024,
      stream: false,
    },
  });

  if (!("choices" in result)) {
    throw new Error("Expected a non-streaming response");
  }

  const message = result.choices[0]?.message;

  if (!message) throw new Error("The model returned no message");

  return {
    result,
    message,
    calls: message.toolCalls ?? [],
  };
}
The SDK nests the request body under chatRequest and takes camelCase fields such as toolChoice, maxCompletionTokens, and toolCalls. It converts them to the API’s snake_case wire format, so toolChoice is sent as tool_choice.
Keep tools on every call, including follow-up calls. We validate returned tool calls against these definitions, and the model needs them to decide whether another tool can help.
The first iteration uses toolChoice: "required" so the example always exercises the tool path. Later iterations use "auto", which lets the model return a final answer after it receives the tool results. If every iteration required a tool, the model would have no way to finish with text. This is a choice made by the example, not an API default. The API default for tool_choice is "auto" when tools are present.
Step 3: Execute tool calls and return the results
Add a helper that runs one tool call and creates the tool message you’ll send back to the model:
async function executeToolCall(call: ChatToolCall): Promise<ChatMessages> {
  let content: string;

  try {
    if (call.function.name !== "get_weather") {
      throw new Error(`Unknown tool: ${call.function.name}`);
    }

    const args = JSON.parse(call.function.arguments) as { city?: unknown };

    if (typeof args.city !== "string") {
      throw new Error("city must be a string");
    }

    const weather = weatherByCity[args.city.toLowerCase()];

    if (!weather) {
      throw new Error(`No weather data for ${args.city}`);
    }

    content = JSON.stringify({ city: args.city, ...weather });
  } catch (error) {
    content = JSON.stringify({
      error: error instanceof Error ? error.message : String(error),
    });
  }

  return {
    role: "tool",
    toolCallId: call.id,
    content,
  };
}
Tool arguments arrive as a JSON string, so JSON.parse() belongs inside the try block. Invalid JSON, an unknown function name, or a failed handler becomes a tool result instead of crashing the loop. The model can then change its arguments, choose another tool, or explain the failure.
The result also carries the original call ID as toolCallId. This is how the model matches each result to the call that requested it. A response can contain more than one call, and each one needs its own result.
This example returns expected parsing and execution failures to the model. Authentication, network, and other request-level errors should still leave the loop so the surrounding application can handle them.
Step 4: Wrap the calls in a capped loop
Steps 2 and 3 handle one model turn. Add runAgent() to connect them:
async function runAgent(task: string, maxIterations = 10) {
  if (!Number.isSafeInteger(maxIterations) || maxIterations < 1) {
    throw new Error("maxIterations must be a positive safe integer");
  }

  const messages: ChatMessages[] = [{ role: "user", content: task }];
  const callCounts = new Map<string, number>();

  for (let iteration = 1; ; iteration++) {
    const startedAt = performance.now();
    const { result, message, calls } = await sendTurn(
      messages,
      iteration === 1 ? "required" : "auto",
    );

    console.info({
      iteration,
      model: result.model,
      tools: calls.map((call) => call.function.name),
      latencyMs: Math.round(performance.now() - startedAt),
    });

    if (calls.length === 0) {
      return typeof message.content === "string" ? message.content : null;
    }

    if (iteration === maxIterations) {
      throw new Error(`Stopped after ${maxIterations} iterations`);
    }

    for (const call of calls) {
      const fingerprint = `${call.function.name}:${call.function.arguments}`;
      const count = (callCounts.get(fingerprint) ?? 0) + 1;

      callCounts.set(fingerprint, count);

      if (count >= 3) {
        throw new Error(
          `Stopped after three identical calls to ${call.function.name}`,
        );
      }
    }

    messages.push(message);
    messages.push(...(await Promise.all(calls.map(executeToolCall))));
  }
}
Each pass calls the model, checks whether it has finished, then appends the assistant message and tool results. The next pass sends that expanded history back through sendTurn(). Append the assistant message before the tool results so the full turn is preserved.
The iteration cap is checked after the model responds and before any tool runs. A tool result is only useful on the next model request, so when the model still requests tools on the last permitted iteration, the loop stops without executing them. Running them there would create side effects that the model can never see or report.
The cap is the only hard limit in the loop, and the check compares iteration with maxIterations for equality. runAgent() rejects a cap that is not a positive safe integer before the first request, because a value such as 0, 1.5, or NaN would never match and the loop would run until the model stopped requesting tools. Number.isSafeInteger() also rejects values above Number.MAX_SAFE_INTEGER, where iteration++ stops producing distinct values and could never reach the cap.
The fingerprint counter stops the run after the same tool and argument string appears three times. Two would stop a model that retries once after an empty or transient result. Three allows that single retry and still stops a stuck model quickly. The threshold and the maxIterations default are application choices, not OpenRouter defaults.
In a production application, normalize the parsed arguments before comparing them so a reformatted but identical call still counts as a repeat. You can also set a different limit per tool.
Test the loop
Finish agent.ts with a small main() function:
async function main() {
  const answer = await runAgent(
    "Compare the weather in Lagos and London. Which city is warmer?",
  );

  console.log(answer);
}

main().catch((error) => {
  console.error(error);
  process.exitCode = 1;
});
Run it from the terminal:
npx tsx agent.tsYou should see one or more iterations that call get_weather, followed by a final comparison. The values come from the local map in Step 1, so you can test the complete loop before replacing the handler with a real service. This is the output from one run against the API:
{
  iteration: 1,
  model: 'google/gemini-3-flash-preview',
  tools: [ 'get_weather', 'get_weather' ],
  latencyMs: 3930
}
{
  iteration: 2,
  model: 'google/gemini-3-flash-preview',
  tools: [],
  latencyMs: 1417
}
Lagos is currently warmer than London.
The first iteration returned two get_weather calls in one response, which the loop executed in parallel. The second iteration returned no tool calls, so the loop returned the text. Your run may differ in the number of iterations, the wording of the answer, and the latency.
Add fallback and concurrency controls
Each control here handles a different failure mode. The iteration and repeat limits stop unproductive behavior inside your application. Your concurrency choice keeps parallel tools from corrupting each other. Model fallback handles an error from the selected model. Auto Exacto changes provider ordering on tool-calling requests.
Start with the stops already in the loop. It returns when the model sends no tool calls, fails when the same call appears three times, and fails when the model still requests tools on iteration maxIterations. Keep the hard cap even if you add time, token, or tool-specific limits later.
Concurrency is the next choice. The example runs its tool calls with Promise.all() because the two lookups are independent. Run calls in order unless you’ve checked that the tools don’t share state. A write followed by a read of the same record must not run in parallel.
Model fallback is the next layer. The models parameter takes an ordered list. The first model is the preferred choice, and we try the next model in the list when the first returns an error, including rate limits, provider downtime, and content-moderation refusals. Your loop reads result.model to see which model answered.
Auto Exacto runs by default on every request that includes tools. For a model served by more than one provider, we reorder those providers using throughput, tool-calling success rate, and results from our benchmark harness instead of price. Your loop doesn’t change to get it. A model served by one provider has nothing to reorder, so check the provider list on a model’s page to see whether reordering applies to the models you pick. If your loop sends large tool definitions on every turn and prompt-cache hit rate matters more to you than provider quality, you can opt out by setting provider.sort to "price" or by using the :floor model variant.
Limit history growth and log each iteration
Every iteration adds the assistant message and one result per tool call. Those messages are sent again on later requests, so large tool results can make the history grow quickly.
If a tool returns a large response and the model needs only a few fields, select those fields before adding the result. You can also truncate the content or store the full payload elsewhere and return a reference. Keep truncated results valid. For example, return a JSON object with a preview, the original size, and a truncated flag instead of slicing a JSON string in the middle.
The loop already logs the iteration, returned model, tool names, and latency. In an application, add a safe hash of the arguments and the stop reason. Don’t log secrets or raw sensitive arguments. A short, consistent trace shows where a run started repeating or reached its cap.
Use MCP tools in the loop
A Model Context Protocol server, or MCP server, exposes tools from another service or process. Your loop still sends tool definitions to the model, receives calls, executes them, and appends the results. The difference is that an MCP client handles tool discovery and execution instead of your local function map.
Use a local handler when you own a few functions and want the smallest implementation. Use MCP when the tools already exist behind a remote server, such as GitHub, Linear, or an internal service.
The same boundaries still apply. Return one result for every tool call ID, keep tools available on follow-up requests, detect repeats, and enforce a cap. MCP changes where the tool runs. It doesn’t remove the need for those controls.
When to move to the Agent SDK
Move to our Agent SDK when you want the library to manage the multi-turn loop, tool execution, conversation state, and stop conditions. It also supports MCP tools, streaming, tool approval and state persistence, and doom-loop detection for repeated tool calls, which is off by default.
If your tools already exist behind remote MCP servers, @openrouter/mcp can discover them and expose them to the Agent SDK’s callModel function alongside your local tools.
Building the loop yourself remains useful when you want direct control over messages, tool dispatch, and stop conditions. It also gives you a concrete way to understand what an agent framework manages for you.
A larger orchestration system may make sense when your application needs durable workflows or persistent state outside the conversation.
Next steps
We handle the model request, ordered model fallbacks, and provider routing. Your application handles tool execution and the limits around it.
For the complete request and response shapes, read the tool-calling guide. For the SDK request fields used in this guide, see the TypeScript SDK overview. To score the loop’s output with a second model, read LLM-as-a-Judge: Score AI Agent Outputs Automatically.
FAQ
How do you decide when an agent loop should stop?
An agent loop should stop when the model returns no tool calls, when it repeats a disallowed call, or when it reaches a fixed iteration limit. Production loops can also add limits for elapsed time, tokens, or cost. They should always have at least one hard boundary and record which boundary ended the run.
What should happen when a tool call fails?
Return the failure as the matching tool result so the model can respond to it. When using the TypeScript SDK, the result should use role: "tool", include the original toolCallId, and contain a clear error message. Catch argument-parsing and tool-execution errors inside the loop instead of letting one failed tool terminate the process.
How do you stop an agent from repeating the same action?
Create a fingerprint from the tool name and arguments, then count how often it appears across the whole run. Stop or apply a per-tool retry limit when the count crosses your threshold. In production, normalize parsed arguments before comparing them so equivalent JSON objects produce the same fingerprint. Allow intentional repeats for polling tools only when the loop has another changing condition and a hard cap.
Do I need LangChain or another AI agent framework to build a tool-calling agent?
No. A small agent can run with messages, tool definitions, local handlers, and a bounded loop. Use an AI agent framework when you need it to manage execution state, approvals, durable runs, or a larger tool ecosystem.